Getting into Sewing Clothes
Written By: Emily L.
Edited By: Connor Fraser
Designed By: Emily L
Published By: Samantha Porte
~This is not a tutorial, nor a strict set of rules. This is simply the perspective of a beginner clothing maker sharing the journey of their first project for those interested~
As I pulled the thread taut and cut the final string, I marveled at my latest work: a black skirt which took over a month to finish. Feeling satisfied towards the clean hems and practically invisible stitchwork, I dusted off the lint and tiny yarns that had accumulated on the fabric. As I did so, my eyes wandered towards the garment that laid folded on top of a cushion in my room. I reminisced upon that time almost a year ago when I decided to pick up my first clothing project.
That is not true, I just needed some sort of relevant introduction. I was not thinking about my first project while I finished that skirt, I was thinking about how to write this very introduction.

But I did not lie about my first project starting almost a year ago. I believe the idea struck me around April of 2021, and this idea of making my own clothing was primarily inspired by the historical costuber Bernadette Banner. She does profound research into fashion history and creates many beautiful articles of clothing. She is also very conscious of her environmental impact through the way of clothing, and thus I believe is a truly good role model on how people can contribute less to pollution through their choices of clothing and fashion.
For those who are not in the know, the fashion industry is one of the largest contributors to pollution and climate change. From the mass harvesting of natural fibres, or conversely the chemically intense process of spinning artificial yarns, to the weaving process, dyeing process, manufacturing and finally the transportation expenses for garments to end up on display in a clothing store near you. With the quick-paced nature of fast fashion specifically, clothing is mass manufactured to meet a hypothetical demand, and this speed is achieved by sacrificing quality, design, ethics and the environment.
Realistically speaking, sewing your own clothes will not completely eliminate the problem; it does cost money, an investment of time and some extra time spent learning the basics. Even then, the harvesting of raw resources up to the weaving process will still take place all the same.
However, picking up this hobby allows the hobbyist a couple more choices. We all love choices, don’t we? When you put yourself in charge of making the garment, let alone choosing the design of the garment, you are able to choose what smaller industries to support. You can choose to support natural fibres which are generally more environmentally friendly over synthetics, and you can choose to actually make well fitted and well made clothes. And since there isn’t an extra detour the fabric has to make in order to be transformed into a garment, it even saves transport fuel from being burned.
I myself had been spurred on to start the construction of my first garment; I finished it and now, along with a hanfu inspired overlayer, I have a horribly time consuming hobby that eats up my life. Gee, thanks a lot 2021 me. 
And so, now I will write to you, dear reader, about the trials and tribulations I faced in my first quest. I will be narrating my every regretted life decision when making this garment along with tips and insights I can give now that I have slightly more experience in this sewing clothes business.
— Conceptualization
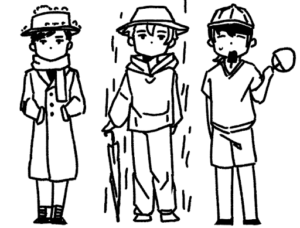
Now, where to start? That would probably be with the conceptualization. What is it that you want to make, and what purposes do you want it to fulfil? These are the main questions you want to focus on, and once you have brainstormed as many ideas as you care to, you can start to narrow down what type of garment would fulfil your purposes best. In my case, I had a very specific idea from the get go; as I mentioned previously, my first project was a hanfu inspired overlayer. Here is a sketch of what I initially had in mind:
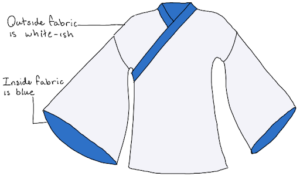
If I am to be honest, the only purpose I had in mind at the time was for the looks. It was intended for summer, or at least warmer times, so I chose some lighter weight fabrics for it. I also chose to line it, since that was the look I was going for: something with separate colours on the inside versus the outside. In hindsight, I now realise that lining it would make it a bit warmer than I thought.
So, when you ponder about what the use will be, you should keep in mind what type of seasonal wear it will be, what weather it should be prepared to face, and if the design elements/colours you plan on using will complement it or oppose your wishes.
On the topic of design, try not to set anything in stone during this initial planning phase. Colours, pattern and extra details should be kept flexible since fabric stores won’t necessarily have your dream fabric conveniently stocked, and at an affordable price at that. It’s fine to set hopes high, just make sure they are attainable.
Unless you enjoy the disappointment merited from broken dreams. 
To each their own.
Finally, this is not a costume. It could certainly double as one, if that is what you want, but the purpose here is to learn how to make normally functioning clothes that aren’t held together with hot glue. Be as eccentric as you want to with it, but try to ensure that at the end of the day, it will still be something you want to wear. Because if it simply sits in the closet abandoned, it’s not living its best life.
— Preparations
Now that the idea is set in stone, it’s time to gather the necessities that one will need in their endeavours. There aren’t many bare necessities; most tools are only if you feel like making your job easier. Granted, some of them will make your work MUCH easier and neater, but that doesn’t mean you need them. Who wants their life to be easy anyways? I apparently don’t.
Let us start with the pattern. Unless the tutorial you plan on following only requires you to cut out squares and triangles, it is strongly
recommended you don’t ~wing it~ with the cutting. There are many patterns available online for free or to buy. You can also find sewing patterns in craft stores, and they usually come with instructions on assembly as well. There are additionally drafting guides on the internet so you can make your own patterns. Other than that is the method of draping, but that isn’t really the most convenient for a beginner, so google search that in your own time.
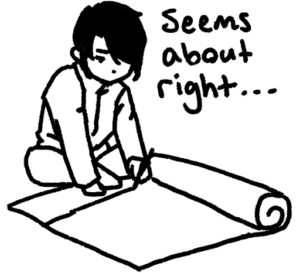
In the pattern department, my choice of first project was abysmal. It was abysmal in that I could not find any (free) patterns on the
internet on how to construct it. So I laid down some drafting paper and just drew it myself. Because it is relatively loose, my mistakes aren’t too obvious. But don’t be too ambitious.
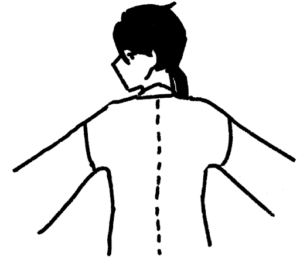
Anyway, in the pattern making process, one nitpicky thing I regret is not splitting the back piece into two. Traditionally, from what I saw in my reference pictures, these tops would have a centre back seam while mine does not. It probably wouldn’t impact the look of it normally, but later on I would decide to make a tweak to the clothes that would indeed make me come to regret this.
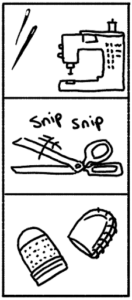
Moving on to important tools, the first one will be either a sewing machine, sewing needles or both. You don’t need a sewing machine to make clothes, and
likewise if you are really that adverse to hand sewing, you don’t need to.
Next, you will need scissors. Preferably very sharp and large ones if you already have them. If
you don’t, somehow(?), you might want to consider buying fabric shears. Despite its name, it isn’t that different from normal scissors, barring the fact that they have a specific design so that people may cut huge things on flat surfaces with little disturbances. Of course, these fabric shears will also work well with cutting large expanses of wrapping paper, should you need it for that. You should also thoroughly consider getting a thimble. You can work without it if you like pain so much. When buying a thimble, know that they are sized, and you can’t expect the first one you buy to immediately conform to the size of your finger. It doesn’t work that way.
Second would be pins of any kind to be used for binding fabric in place temporarily. Straight pins are a common choice; safety pins for the paranoid or if you
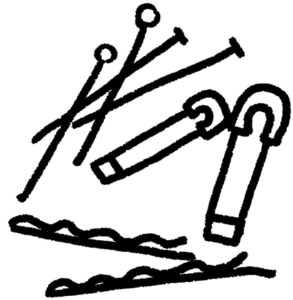 plan on having the garment pin closed. I find bobby pins to be extremely useful on edges where I want the fabric to be pinched together, as using straight or safety pins distorts the fabric to a slight degree.
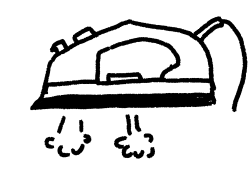
Third is an iron and ironing board/surface. Working with wrinkled fabric is really difficult, there are no two ways about it. Besides that, it is good practice to iron your seams so they turn out crisp and flat rather than lumpy and obvious. It also makes finishing those seams off much easier.
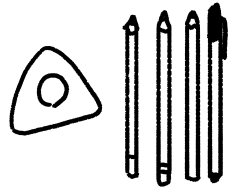
The last thing I can think of is a method to mark the fabric temporarily. I use tailor’s chalk because that is what I have seen people use. You can also use a watercolour pencil, a pencil or pencil crayon. Be aware what type of marking will work for your fabric, because some of them will not come off.
— Materials
To start, fibres can usually be split into 3 groups: natural, synthetic, and semi-synthetic. Natural fibres are, of course, naturally occurring fibres that are spun into fabric(or thread), common ones being cotton, wool, linen, and silk. Synthetic fibres are entirely constructed from chemicals and can usually be equated with plastic. Polyester is the poster figure of synthetic fibres, but there is also spandex and nylon. And lastly, there is the semi-synthetic fibres. Interestingly enough, these are natural materials such as bamboo or wood, who are chemically broken down and then reconstructed as yarns. There are a lot in this category that I had originally thought were synthetics, for example rayon, acetate, and viscose. But nope. A very common feature amongst them is that they aren’t as durable. But on the other hand, they are slightly more breathable than synthetic fibres, if only just that little bit. They’re also biodegradable, since they are still made of plants. I personally don’t know much more about them, so that’s all for the semis.
One huge con of these huge companies pumping out heaps of polyester shirts is that overall, synthetics are not breathable. Plastic doesn’t absorb water, so having it draped over your body is, as you can imagine, very sweaty and uncomfortable. Not only that, the creation of such fabrics is very chemically intense, and the products themselves stick around well past their welcome. It is not that the fabric itself is an evil existence, but the way people deal with it when it becomes useless in their eyes is rather harmful. They aren’t biodegradable; unless they are sent to fabric recycling or donated and given another life, they are basically the same as any other piece of plastic littered on the earth. Good points of synthetics are that because they are so prevalent and convenient to manufacture, they are affordable and come in many different prints and colours. They are also rather durable, even the earth can’t break it down that easily.
But on the other hand, natural fibres and their fabrics are usually the preferable option when someone wishes to not drop a small bomb on the environment. That is an over exaggeration, but the point is made.
Starting off with the most mundane of the four: cotton. The cotton mass production industry is actually pretty bad for the environment; it is only ~comparatively~ better. But buying organic cotton is slightly alleviating in comparison to inorganic cotton. This likely also correlates to it’s price as, surprise surprise, it tends to be the most affordable natural fibre option. It is definitely breathable, and it is also washable. One issue is that it can hold onto odours.
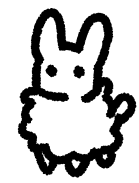
Another common one is wool. Wool does not only come from sheep, it can come from camels, alpacas, even rabbits, so be careful of any allergies. Wool,
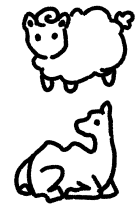
while indeed very insulating and warm, is also surprisingly breathable as well. Particularly the lightweight and lighter coloured ones. They can absorb three times their mass in water, and when aflame, they self extinguish. One caution is that they can shrink, so do not agitate them in warm and/or wet conditions; meaning don’t wash them in warm or hot water and be gentle.
Thirdly, and this one isn’t as well known: linen, or hemp. Not that hemp, that one is quite famous. These fibres are extracted from flax and hemp plants and are essentially the ideal sweat wear because they are so breathable. They are very washable and don’t hold odours like cotton does. They do wrinkle, and sadly, because they are rather laborious to turn into fabric, they can be on the expensive side.
Finally, is the stereotypically flashy silk. Cultivated from silkworms, silk is very insulating and not breathable one bit. Even semis can do better than silk in that department. It is also usually not washable, not because of the fibre, but because of how the fabrics are usually finished. Huh, putting it this way, why do people like silk so much?
Speaking of weaves, there are a plethora of unique ones that can be stretchy, stiff, textured, patterned, and made for different uses. It is usually said that beginners should not use stretchy fabric because it is a nightmare to cut, measure and sew.
I used stretchy fabric for my first project; a wine coloured rayon and an ivory-ish blend of mostly linen or cotton, I don’t remember. I didn’t want to torture myself so, but I simply couldn’t find any others in the right colour.
The outcome of that is a lot of bubbles in the lining.
Did I learn my lesson? No. But maybe you should.
And this game of fibres extends to thread as well. Though not as varied, there is polyester thread, nylon thread, cotton thread, silk thread, and linen thread. Sadly, the limitation of colours applies here as well. However, something I learned is that it’s fine if you don’t get the exact hex code of a colour to match your fabric; if it is slightly different, it blends in just fine. You may also choose a contrasting thread colour; that way it doesn’t even matter anymore. Finally, as long as you really get good at sewing seams, the thread is practically invisible as long as you don’t want people to see it.
— Process Work
Now, I ain’t about to tell you the step by step process on how to sew every garment that exists on the face of the Earth because I don’t have time for that and I would not know half the things I would be writing about in said hypothetical situation. Also, 99% of that content would go unread by everyone besides the poor editor, let’s be honest. Yet, there are some tips I can give that will apply rather broadly to any menial sewing project of yours.
- Prewash any fabric that you may wash in the future. For silks and some wools, you can skip this step, but in general, fabrics bought from the store will shrink in its initial wash. It may be little but some fabrics can shrink a whole lot. Some stores will give you a tag specifying the details, but overall, handwashing with cold water is safest. Also, you might want to wash the future garment the same as well.
 Those bubbles in the fabric might have been because I machine washed this one, I certainly am uncertain. I know I screwed up one way or another, though. The only question is: which way?
- Do the research. It’s not that difficult since many people post their tutorials online anyway. Learn the basic stitches and what they are used for, because sewing isn’t just over and under. Even machines have more than simple stitching in straight lines, leverage that to your advantage.
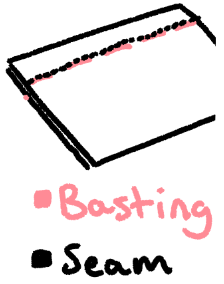
- Baste. This means sewing large stitches as a sort of “rough copy” in order to tack the fabric in the right place and prevent shifting. Pins are only for temporary anchoring, so it is important to bast so that your stitches are nice and even. It also speeds up the process since you don’t have to stop to take out a pin, and you don’t risk a distasteful stab. But it will be quite the journey to fish those basting threads back out once you’ve stitched over them. A worthy tradeoff, in my opinion.
- Finish your seams properly. Unless it is a very delicate area where bulk is horribly undesirable, or your fabric simply does not fray a single yarn, please finish your seams neatly. There are many ways to do this: bag lining, rolled hems, counter hems, folding over seams, French seams, English seams, so very many. But if you don’t, your seam allowance frays, thread and lint go everywhere, the long threads in the overlocking catch on things, and the inside of your garments will look like a steaming hot mess.
Personally, I love seeing neatly hemmed seam allowances because they look so crisp and neat, and I am well aware that the inside of my garment doesn’t look like steaming hot garbage. Definitely flawed, but at least not steaming hot garbage.
- My final tip is one on being less wasteful. Leftover fabric should be reused to make anew or repair the old. Fabric scraps can also be sent to fabric recycling, where it will be broken down into yarns, rewoven into fabric and redyed to create a new product. Be especially careful with any synthetic fabrics or thread you use. If not sent to fabric recycling, at least keep any scraps or thread clipping in some bin or bowl to use as stuffing. After all, the impact from throwing out a plastic straw or a heap of polyester isn’t that different.
— Final Thoughts
I find my finished piece to be really amazing(for someone who was just flailing about) and I am rather happy with the result. But I still have a perfectionist side and it will most certainly be pointing out everything I am the slightest bit dissatisfied with. 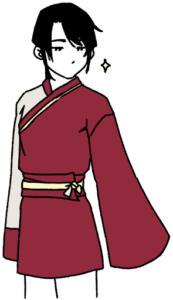
Besides everything I already mentioned, I wish I had planned and measured things a bit more than I did, as the connection between the arms eye and the sleeve opening is just slightly off.
Next, on the collar inside, I should have probably li
ned the inside because the inside of the collar funnels the essence of hot garbage and I don’t like that.
Finally, because I was free-handing the pattern, I was overly cautious of things like seam allowance, and I made the two front panels uneven, thinking I could always change it if it wasn’t right. Well, I’m lazy, and I never did and never plan to. So when I wear it, I have to make sure there aren’t any large wrinkles in undesirable places.
But oh well, what’s done is done, and I am, as I have already said, much too lazy to think of changing it now. I made a sash for the outfit and now t’is over.
— The End
Your sewing project, unless you have the blessing of a sewing machine, will not take a day to finish. Heck, mine took over a month even when working over nine hours a day, seven days a week. Clothes making in general is a very time consuming process, thus it does not make much sense why outfits these days are so cheap, until you realize they’re of pretty horrible quality. Clothing is an investment, not just some consumable. And I believe that once one takes the time to create, step by step, a well made, albeit imperfect, article of clothing, they will then come to understand the actual worth of clothes that unfortunately is widely not given.