Back to September 2018 Newsletter
How to Grow Garlic from Bulbils

This article was originally published in Seeds of Diversity ebulletin August 2016.
We offer bulbils from 48 varieties of garlic to help gardeners and garlic collectors preserve the amazing (and delicious) diversity of our favourite bulb.
Bob Wildfong
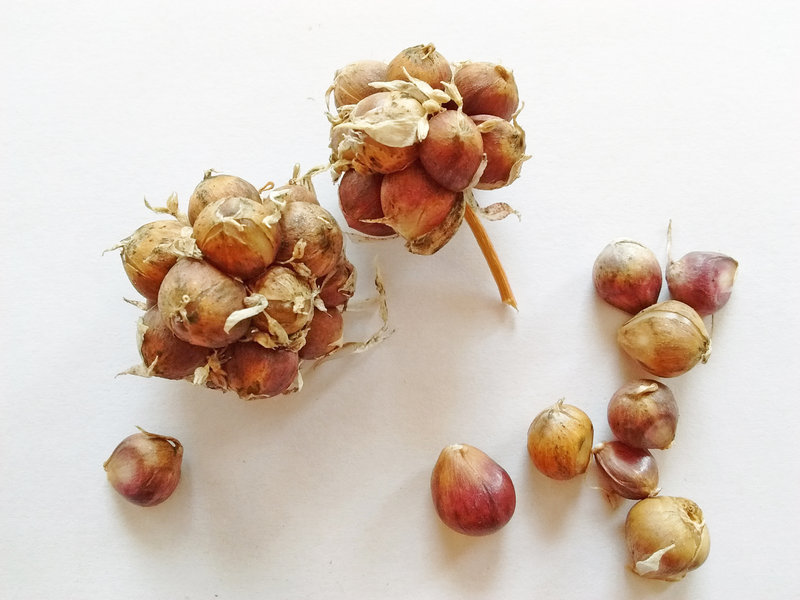
However, if you let the scape grow and mature, at about the same time that you harvest the underground bulb you can also harvest tiny teardrop-shaped "bulbils" from the top of the scape. Each bulbil is like a tiny garlic clove, and it will grow if you plant it. After one season, most bulbils grow into a small round bulb that isn't divided into cloves, sort of like a crocus or tulip bulb. These "rounds" can be peeled and eaten, but if they're planted for a second year they usually grow into a regular garlic bulb, with the usual cloves.
Bulbil-grown garlic is genetically identical to its parent plant, because bulbils aren't true seeds. Just like the cloves in the underground bulb, they're divisions of the parent plant so the garlic that you harvest two years later is cloned from the original. That means you can grow different varieties right next to each other with no crossing, because there's no pollen involved in this propagation.
Why grow bulbils?
Two years might seem like a long time, but the main advantage of bulbil-grown garlic is that properly harvested scapes don't carry soil-borne plant diseases that infect the underground bulbs. Growing garlic from bulbils can reduce the transmission of diseases and pests that can be carried on cloves, or on soil. Once the initial two-year wait is over, as long as you continue to plant in soil that hasn't been exposed to garlic diseases or pests, you can just plant the cloves every year as usual, harvesting great garlic every year.
Many growers have found that bulbil-grown garlic is larger and more vigorous than conventional clove-grown garlic. The reason could be that it suffers less from disease pathogens that inhibit the plants' growth. The same effect is well known with potatoes, another clonally propagated crop. When potatoes are grown year after year in soil that contains disease organisms, the diseases build up in the potatoes themselves, and the yield declines. But if certified disease-free potatoes are planted, they grow large and beautiful. The same thing undoubtedly happens with garlic, but there's no such thing as certified disease free planting stock for garlic. Bulbils might be a way to create your own!
Another reason to grow from bulbils is that some garlic varieties produce many more of them than cloves. For some typical varieties, an average scape can produce over 50 bulbils, whereas an average bulb has only 4 to 6 cloves. Even though it takes two full seasons to go from bulbil to mature garlic, you can multiply some varieties much faster with bulbils.
How to plant bulbils
Plant bulbils in the fall and harvest in mid-summer, just like cloves. Remember though that bulbils are very small, so their green sprouts will also be very small, like individual blades of grass. It's very easy to lose them in weeds, so we suggest planting them in containers for the first year. Deep containers are best to allow good root growth, and since you uproot the "rounds" after the first season, bulbils can be grouped in a container together.
Plant at least 10 bulbils of each variety in a plastic pot at least 6 inches deep (10-12 inches is better). They should be planted just one inch deep, and 1-2 inches apart from each other in the container. A plastic pot 6 inches in diameter should give plenty of room for 10 bulbils evenly spaced.
Sink the container into a hole in the ground outdoors, so the rim of the pot is just above ground level, and mulch with straw or leaves. This will prevent the bulbils from freezing and thawing excessively. In spring, remove the mulch to allow the tiny sprouts to grow. Make sure they're consistently watered and prevent weeds from growing in the containers. At about the same time that regular clove-planted garlic is ready to harvest, you can dig up your bulbils, which should have grown into "rounds" of about 1/2 inch to an inch in size. Plant these in good disease-free garlic beds in the fall, just like cloves, and they should grow into full divided bulbs by the second summer harvest.
**
Bob Wildfong is the Executive Director of Seeds of Diversity Canada.
Not yet a member?
An annual membership to Seeds of Diversity gives you access to our seed exchange, seed grow-out programs, and our online news.

We depend on donations to do our work.

Thank you for your support!
